


8 Tips for Your First High-Tech Aquarium
Written By: Chris (@shrimpery)
It is easy to get so carried away in the excitement of decorating your planted tank that you neglect to build a foundation for a sustainable setup. In particular, going the high-tech route can be particularly unforgiving, especially if utilizing demanding aquatic plants (in the hobby, ‘high-tech’ refers to the use of injected CO2). Here are eight tips for your first high tech aquarium that will help avoid extra headache down the line.

1. Start off with the biggest tank you can fit and afford.
The larger the tank, the more stable the water parameters and the more room for creativity and livestock. Although not everyone has the space for a 50 gallon or larger (including myself), try to stay above five gallons for your first high tech tank. Once you start mastering the hobby and are able to keep things running successfully, you will have an easier time maintaining smaller sizes.
- Tip: Ultum Nature Systems glass rimless tanks come in a range of sizes and are my go-to for a clean, professional look.
I prefer to use 20 gallons, or else smaller tanks with a higher surface area to volume ratio (such as a shallow tank) to ensure adequate balance and gas diffusion. Keep in mind that in a very small tank, the smallest changes in water parameters, CO2 distribution, and livestock feeding pattern can create wild fluctuations and imbalances that can harm plants and livestock.
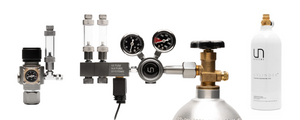
2. Use a high quality pressurized CO2 regulator and canister.
You may see cheaper regulators or small, disposable CO2 canisters offered for sale at your local pet shop; you may have also seen ‘live CO2’ kits (like the Aquario NEO Kit) that produce CO2 via fermentation. Unfortunately, these methods do not often yield the desired 'high tech' results. The pressure needed to diffuse the gas into the water is often inadequate if set up incorrectly, or the supply runs out too quickly/fluctuates too often.
For optimal quality, it is best to get a serious regulator with a solenoid valve (like the UNS Pro Regulator!) that can be used on a timer. For a canister, purchase a larger CO2 tank that needs to be filled infrequently, or use smaller 20 oz paintball canisters (more convenient for filling and storing). Most welding/propane shops, paintball stores, and chain sporting goods places will offer CO2 for a relatively inexpensive price, but the cheapest in my experience are the welding/propane shops.

3. Use an oversized filter.
If your filter is “normal sized” for your tank, it is likely too small. It is best to use an external canister filter, such as a Delta 90, that is rated for a larger sized tank in order to maximize water volume, turnover, and circulation. Just be sure to modulate the outflow such that it does not create excessive current that disturbs livestock and substrate. This can be done with specific outflow pipes or valves.
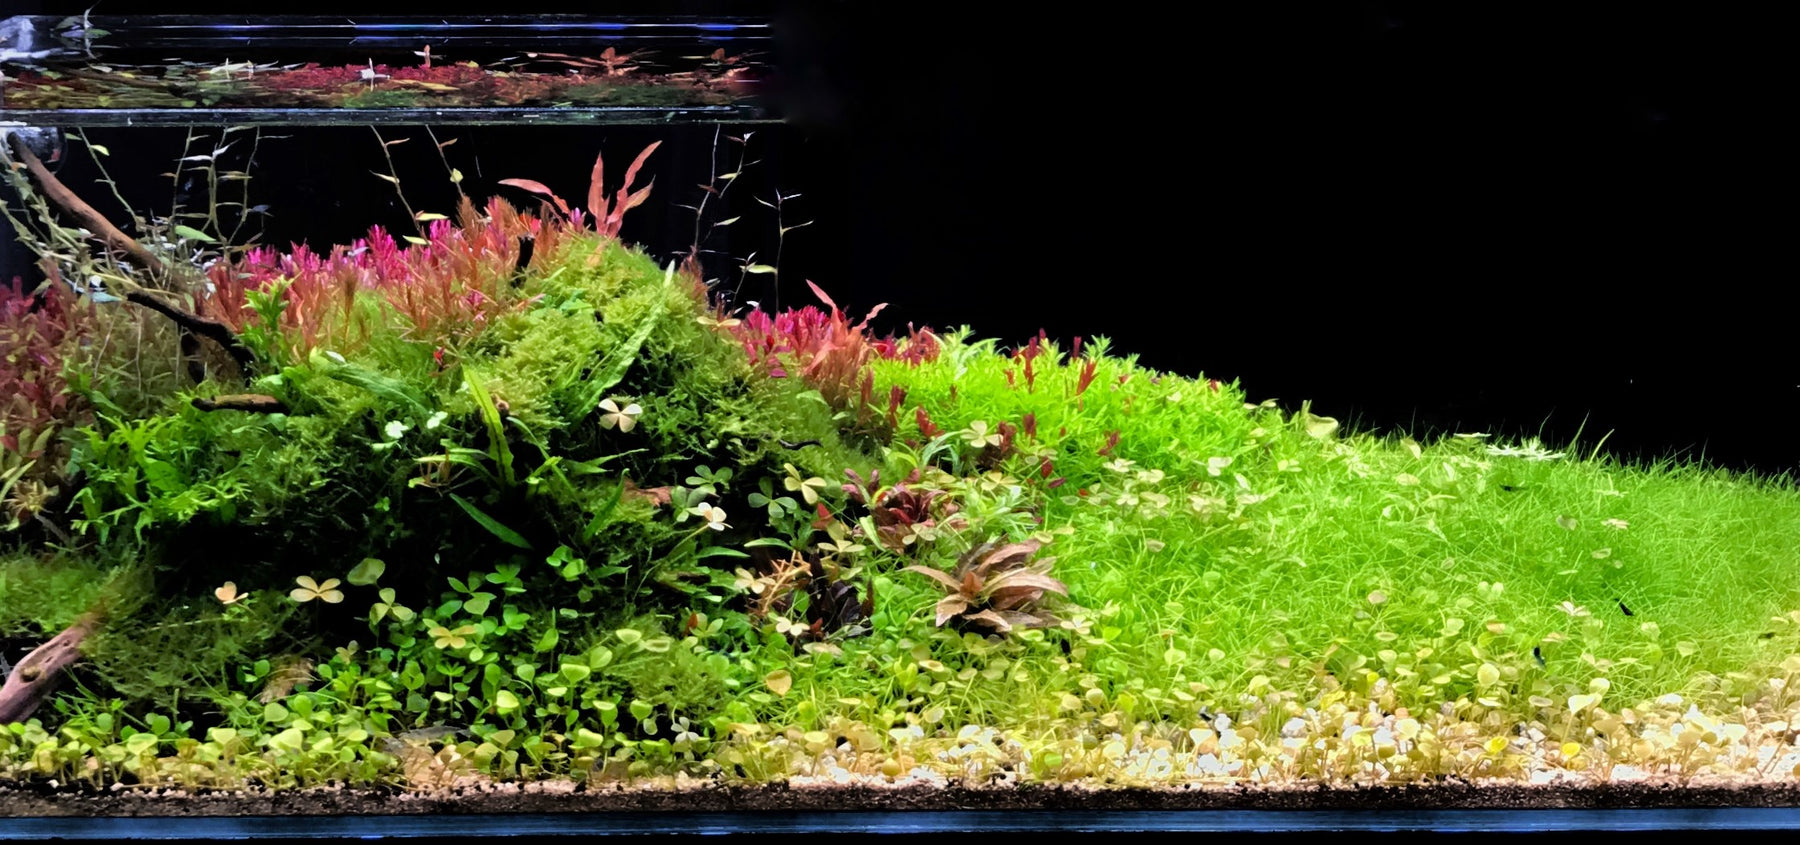
4. Plant heavy right from the start.
This point can’t be overemphasized. If you reflect on the various tanks you see on social media, a hallmark of the “amateurish” appearing tanks is an abundance of hardscape, and especially, substrate, with spare plantings. The owners of tanks like these are seeking to avoid excessive spending and hassle on plants, with the idea that the plants will “fill in.”
Unfortunately, our formidable adversary, algae, will be more than happy to fill in those gaps for you in a brand new and unbalanced tank. This is especially true given the excessive nutrients and decaying organic matter that are present in any brand new scape. If you use as many aquarium plants as possible right from the start, the plants will have a significant leg up on the competition. Plus, your tank will look more professional and visually appealing.

5. Water changes are absolutely essential, more so than ever in a new tank!
When I set up a brand new, uncycled high tech tank, I make sure to do a 25-30% water change every other day for the first week, eventually settling on twice a week (or more). While it is pleasant to imagine that we are creating “a slice of nature” or that the tank is “self-sustaining,” you are in fact keeping lots of organic material with the potential to decay in a small and closed-off system.
To prevent the system from becoming to stagnant or worn down, in addition to ample filtration, it is important to replace the water as it accumulates excess nutrients and wastes. If not, these will build up at the expense of the health of your flora and fauna.
6. For most enriched substrates, there is no need to add fertilizer for the first two weeks to a month.
Nutrient-rich substrates, like UNS Controsoil, tends to leach a lot of nutrients into the water column at first, which will be more than adequate for most plants. Although, if you add fertilizer on top of that (especially when the plants are just settling in and getting their bearings) you are really just feeding the algae, so to speak.
Unfortunately, nutrient content does vary by substrate type and declines with time, so you should gradually add a liquid fertilizer as needed (yellow leaves on plants or stunted growth several weeks after setup is a sign). Keep in mind that melting of leaves within the first week of adding plants is perfectly normal and a sign that the plant is adapting to the unique water parameters and environment of your setup.

7. Diatoms are normal in a new tank.
As much as I like to brag about my lack of algae, the truth is that all new tanks have a brief “diatom” phase where algae seems to take over. Have faith- with normal maintenance as outlined in this post, the diatoms will disappear within a month or two (or even as little as a few weeks). Manually remove as much as possible, while keeping an eye out for more sinister algae such as cladophora or staghorn.
8. Do not overstock.
Use less fish than you think you can fit in the tank (because shrimp have such a negligible biomass compared to fish, this rule does not apply to our invertebrate friends). Besides making fish stressed out from cramped living conditions, you are increasing the amount of fish waste in the water, resulting in poor conditions for your aquarium plant growth.
Plants are not really "natural filtration.” They utilize nutrients to sustain their metabolism, but they are not massive sumps for excess wastes (especially the considerable amount of nitrogenous waste that fishes produce- not to mention uneaten fish food). In general, high tech tanks look best with smaller fish that can comfortably explore their environment, with maybe a slightly larger fish here and there.
There are plenty of other tips out there that I could share, but these are the eight that I find most critical to success in a high tech aquarium. It is easy and fun to decorate a new tank for some initial photos, but it can quickly become very tedious to perform endless maintenance catch-up (or rescapes) from initial mistakes at setup. If you adhere to the points above, you will have a good framework to operate within, which will free you up for more of the exciting stuff!
Has this article helped you? Please leave a comment below!
If you have any questions regarding this article, please DM us on Instagram or Facebook so we can assist you! @buceplant
Leave a comment